Tuesday, November 15, 2011

Stilazzi, the next big Beauty Distributor

Stilazzi Makeup Case Review

Yes, yes, I know I haven't been on for a minute, but I'm back to share some good news!

About a month ago, a new beauty distributor located in L.A. sent out a tweet asking if any beauty bloggers or YouTubers would like to score some free products in exchange for reviewing/blogging about them. Of course, I wasn't going to turn this down, so I responded ASAP. Luckily for me, I got a golden ticket and made it to the first round of bloggers!

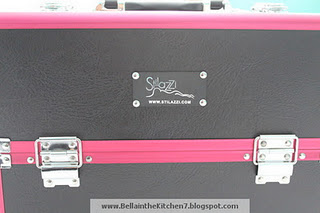
The company is called Stilazzi, and they are a beauty distributor that sells a plethora of makeup and beauty-related products, ranging from airbrush systems, train cases, disposables, etc. The best part is that you don't have to be a professional to purchase their products. To learn more about them, click here.

Stilazzi is based in North Hollywood, so if you live in any of the surrounding areas, make sure to stop by and tell them I sent you! Before I show you guys the first product they sent me, I would like to thank Matt at Stilazzi for giving the me this wonderful opportunity! Thanks Matt!

And without further adieu, I present to you...


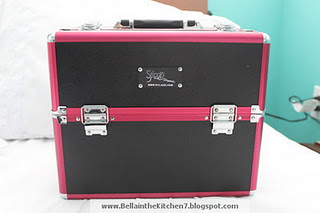
Front of Train Case STZMC8-BF


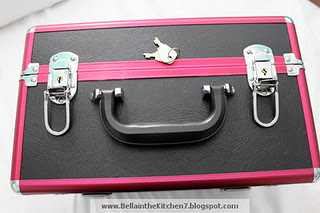
Comes with a set of keys to protect your belongings.


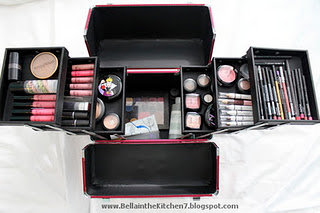
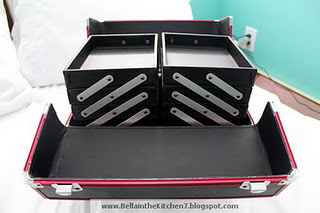
Filled with all my makeup!

Isn't she a beauty?!

From all the different color combinations this train case comes in, I'm glad that they sent me this one. Not only does it look snazzy and professional, but the pink trim just adds some extra “girliness” and pizzazz to it. The case comes with two snap locks and a pair of keys, so you can be sure that your makeup and beauty products will be secure. It also comes with a three-tiered tray on each side that are pulled out to expose the deep-set bottom area. This section, judging from a quick eyeball test, could hold a ton more products. This case is definitely built to last, and I know those of you who purchase it will be very happy with it. The only recommendation I have is that the case should include a detachable strap (but how would I carry it if my hands were full anyway?) Nonetheless, it’s a great case, and I give it my full, wholehearted recommendation!

*This product was sent to me by the Stillazi, but all opinions mentioned, both positive or negative, are strictly my own.
**BTW Stilazzi is having a 50% off sale on this all their other beauty cases. Enter code CASEDEAL at check out to pay only $44.97! Offer is only available online and has no end date as of yet.
***Don’t forget to follow @FrendsBeauty and @Stilazzi or add them as friends on facebook to receive notifications about other awesome deals!

Monday, August 15, 2011

Korean BBQ in the Comfort of Your Home

As a big fan of Korean BBQ, particularly the do-it-yourself aspect of it, I decided to try to make it for dinner. My boyfriend was a week away from taking the California Bar exam, so he needed to load up on brain food. Not sure if Korean BBQ would be characterized as "brain food," but it seemed to be a good diversion from studying.
Fortunately for us, there is a great Korean market right down the street from us -- Greenland Korean Market --, so I was able to pick up all the ingredients I needed for our dinner. While I was there, I also grabbed some things I was going to need for our Shabu Shabu night. [FYI: the Korean BBQ and Shabu Shabu dishes I am making this week are not part of my New Years Resolution, as I've made them before.] 
 
Here's what my shopping list for our Korean-themed dinner looked like:
  • Pork Belly
  • Soy Bean Paste
  • Red Leaf Lettuce
  • Green Onions
  • Kimchi
  • Sesame Seeds
  • Hot Pepper Paste (already had some at home)
 I have to thank Maangchi for posting all her authentic Korean recipes online and making them available to those who want to learn to cook Korean dishes. From her website, I used her recipes to make: Pajori (Green Onion Salad) and Ssamjang (Soybean Paste Dipping Sauce)Kimchi Fried Rice, and Gye Ram Jjim (Steamed Egg).
 
Let's begin, shall we...
 Ingredients for Pajori with my addition of lettuce.
 The dressing for the Pajori is made from soy sauce, sesame sauce (I used both hot and regular), garlic, toasted sesame seeds & sugar.
 Dressing for Pajori
 Ssamjang (Soybean Paste Dipping Sauce)
 I also added some soy sauce to the soybean paste dipping sauce, just out of preference.
Ingredients for Kimchi Fried Rice.
A quick tip: it's best to used day old rice to make fried rice, as the hardened texture gives it nice consistency. I sauteed the day old rice with a little oil, garlic, kimchi, and some pork belly that I had cut up into bite sized pieces.  
Here I've added the green onions and hot pepper paste which gave the rice and nice reddish tint.
 Gye Ran Jjim (steamed egg). Only made with 4 basic ingredients. Water, eggs, green onion and salt. The authentic recipes calls for salted shrimp sauce or fish sauce but we didn't have that on hand so I just used some salt. Who knew this was so easy to make!
 Steamed egg mixed and ready to be cooked in the microwave on high for 5 minutes.
 No BBQ grill at the house, so we used the good ol' Foreman (which could have been the Hogan, if things played out differently) to cook the pork belly.

 Gye Ran Jjim
  Starting from the blue bowl going clockwise: Pajori, Gye Ran Jjim, Kimchi, Sesame oil with Salt and Pepper, Kimchi Fried Rice, Pork Belly, and Ssamjang. Yes that's some pretty awesome presentation, but like the saying goes, "You eat with your eyes first," hence the effort in the plating. 
 Pork Belly
 Pajori
Kimchi Fried Rice

    
It might seem like this whole dinner would take long to prepare, but actually only the cutting of the vegetables took a while. Otherwise, everything else I did was measure and mix ingredients the recipes called for. All in all, it was a great dinner. My boyfriend loved it, as we didn't have to venture out to get a Korean BBQ fix, but instead, enjoy it in the comfort of our home. And while it wasn't "brain food," per se, it was a great distraction to studying!

If you're a fan of Korean food, you should definitely take some time to peruse Maangchi website and try out some of her recipes. Hey if I can do it, so can you!

Stay beautiful, and stay hungry!


Wednesday, August 3, 2011

Summer 2011: A Time of Color Blocking

A year from now, when I look back on the summer of 2011, I’ll likely remember: color blocking (FUN!); and weeds (as in, unwanted, wild plants).  While color blocking is the more fashionable and understandable, I won’t soon forget the latter.  How do you figure, you ask?  Well, bear with me, and I’ll try to make as much sense of this as possible.

Color Blocking

Although the trend of color blocking was (re-)introduced during the spring, particularly in fashion magazines and campaigns, I started to really appreciate it in the summer.  Sure, spring time is often associated with blooming flowers and sunny weather.  However, I see spring colors as being a bit more subdued, i.e., pastels.  It’s during the summer that we can really highlight the variety and brightness of colors.  And color blocking is the perfect way to do this.

Simply put, it combines the use of two or more blocks of colors in an ensemble to support, complement, and, most importantly, accent each other.  Whereas simply matching colors of an outfit is done to pair traditionally complementary colors or to prevent clashing, color blocking purposely places colors that are on opposite sides of the color wheel next to each other.  The result: bright colors, fun combinations, and bold, daring looks.

Summer time is the perfect time to pack up your blacks, grays, and darker colored clothing, and to bring out all your bright colored clothing, accessories, and shoes.  Just that little pop of color to an outfit will show others around you that you are daring and aren’t afraid to be bold.  And as they say: “Fortune favors the bold.”  For those that are a little weary of wearing a brightly colored top and bottom, there’s always the option of color blocking with something a little smaller, such as a purse, belt, or shoes, to give their outfit a little pizazz.
Picture 1
Picture 2

Picture 3
Picture 4
Picture 5
Picture 6
Picture 7
Picture 8

* Pictures: See pictures above for examples of color blocking.  Special thanks to the up-and-coming model Lillian Rullamas-Liquigan!  At two years old, Lily is the perfect combination of adorable and cute, and she is already blazing a trail in the modeling world.

One of the more interesting color blocking combos that I would’ve never thought would work is orange, green, and purple.  When I think of those colors, I automatically see the Joker from Batman (See http://tinyurl.com/JokerColorBlocking and note that purple suit, orange vest, & green hair).  Definitely not something I’d define as traditionally fashionable.  But now that I see the combination of these three colors in action, be it on actresses, on models, or in magazines, the more I’m interested in taking a risk and trying it out myself.  It’s that kind of boldness and experimentation which makes color blocking such a fun and awesome trend.

Not only have I tried to incorporate color blocking with clothes; rather, I’ve also tried to apply it in different areas, to which I’ve gotten awesome results.  For one, color blocking works great for nails! I’ve used the combination of yellow, pink and purple, at despite the odd color combination, I loved the results! 

*Pictures: For color blocked nails: I was definitely trying to go for brighter colors.  However, they didn’t come out as bright as I had liked, as you can see in the above pictures.  Nonetheless, the combination of the colors works, and I’ve received many compliments on them!  I’ve also done some color blocking with my makeup, coral lips, and purple and turquoise eyes, as you can see in picture #7.
And I’ve even implemented color blocking with food.  Yup, you heard right...color blocking even works well in the kitchen!  I’ve used color blocking while decorating my cupcakes using the orange, green, and purple combination, making fashion now edible!  See Picture #8 above for a taste of the colorful cupcakes.
As I’ve show in my three examples, fashion is no longer just about clothes and accessories.  With the resources we have nowadays, and with a little risk and experimentation with colors, you can make your nails, your makeup, and even your food as fashionable as your wardrobe can be.

Picture 9
Weeds

    While not really a trend, I’ll always remember the weeds of Summer 2011.  It wasn’t for anything related to fashion.  Instead, it was a hilariously adorable moment involving none other than the delightful Lily.  Fortunately, we were able to capture the moment in a picture.  To elaborate, during her fabulous modeling session, Lily “took five” to admire her surroundings.  Being the open-minded, inquisitive spirit that she is, Lily approached a patch of weeds, one of which was as tall as her.  With one breath, Lily inhaled the intoxicating “aroma” of the weeds.  As you can see in Picture #9, Lily’s face demonstrates that even weeds can be pleasant!

Tuesday, July 12, 2011

Sopes Al Pastor

Hello all!

My New Years Resolution is still going strong: 13 new dishes learned, 11 more to go! 
 
Since I didn't start blogging until recently, here is a list of the dishes I've already learned to cook this year: Butterflied Cornish Hens, Hot Wings, Dak Kang Jung (Korean Sweet & Crispy Wings) Kefta Kabob's,HummusHumbaEggless TiramisuPad Kra PowFujian Fried Rice (Chinese Fried Rice with Gravy), Short Ribs with Tagliatelle, Lisa's Mushroom Burgers, Pernil (Puerto Rican Pork), and Al Pastor. Hungry yet?

 With access to all these sites with free, delicious recipes, I'm sure I'll find a few staples that I'll keep in my cookbook to use for years to come. And thank you to all those people whose recipes I found online, without whose help I'd be stuck just using the traditional cookbook!

This past Thursday (7/7/11), I decided to make Sopes Al Pastor. Although I did not make the sopes from scratch, I made sure to get an authentic recipe for the al pastor. Luckly, my co-worker, Letty, has a great recipe which she shared with me. Thanks Letty -- that recipe was so easy to make and more importantly, delish! No more buying the pre-marinated kind from the store that isn't that good. While I was at the store, I decided to also get some Mexican-fare essentials: salsa verde, refried black beans, queso fresco, and avocados (for some guacamole), to complete our meal.

Frying up the pork that I cut into bite-sized pieces!
Here I added the seasonings and pureed chipotles.
Time to fry the sopes.
Hot off the pan and ready to eat. Don't mind the no make-up look.
Missing our refried black beans.
Are you hungry yet?


Thanks for reading! If you have any question about this, or anything else, feel free to e-mail me.

Stay beautiful, and stay hungry!


Saturday, July 9, 2011

Sigma Dry 'N Shape

Hi all!

Last week, I got to try my newest beauty products, 
both from Sigma Beauty: Dry 'N Shape and F80 Flat Top Kabuki. 
*Btw: you get a free gift from Sigma with a purchase of over $30.

First thing that I tested was the F80 brush.
For those of you who want to apply foundation flawlessly and effortlessly,
and even look as if it's been airbrushed, I suggest you purchase the F80 brush.
It's basically the the holy grail of brushes for applying foundation.
I don't think I'll be using any other brush to apply my foundation
(unless of course Sigma comes out with a new and even better one).

Free gift travel size E25, F80 brush, and Dry 'N Shape
F80 Flat Top Kabuki $16
Dry 'N Shape $29 which can also be used as a brush roll.
Free gift! Travel size E25 Blending Brush that I have yet to try.

Brush cleaning:
Brushes ready to be cleaned!
Wash brushes with a mild soap such as baby shampoo, 
and rinse under water until it runs clear. 
(Notice the detail of the pellets of water -- cameras these days!)
Remove excess water from brushes by wrapping in a towel.
Make sure all the brush hairs remain in the band 
(FYI: the tighter the band, the faster the brush will dry. 
Thanks for the tip @simone_sigma).
Dried and shaped by Sigma's Dry 'N Shape. 
Can you tell they've been reshaped?
Brushes ready to be used again.

Unfortunately I did not stay home and wasn't able to time how long it took for the brushes to dry. But when I did get home, all of the brushes, even the thicker ones, were completely dried and reshaped, as you can see in the pictures. 

In conclusion: this system will help speed the process of cleaning your brushes faster, while also extending the life of your brushes. I used to dread having to clean my make-up brushes because I'd have to wait for them to dry over night, but now, the time is cut down to 4-6 hours. Wash them at lunch, and they'll be ready for use at night!

For more information about Sigma products, check out their website: http://www.sigmabeauty.com/

Thanks for reading! Stay beautiful, and stay hungry!